Disclaimer: These are general build-planning notes. They are not airworthiness data, and they do not replace the approved Piper PA-18 drawings, the instructions that come with each component, FAA guidance such as AC 43.13-1B, or the advice of your inspector and your A&P/IA. Where a specific value matters (torque, rigging, clearances, hardware sizes), get it from those sources, not from these notes.
1. Getting Started, Tools and Paperwork
Practical tips
- Inventory the kit against the shipping list the day it arrives. Check each group (fuselage, tail, wings, gear, cables, firewall-forward) and report anything missing or damaged right away, while the shipment is fresh.
- Keep a set of the PA-18 drawings at the bench. Many builders laminate the sheets they use most and keep them on a large work table so they stay clean and close at hand.
- A big, flat, level table pays for itself many times over. So do sturdy stands for the fuselage and wings. A fuselage rotisserie makes the underside work much easier on your back.
- Buy good basics before you need them: a quality drill and deburring tools, a rivet puller, safety-wire pliers, a torque wrench you trust, and a set of inspection mirrors and lights.
- Organize hardware by part number in labeled bins. Mixed-up hardware is one of the most common sources of lost time.
Paperwork from day one
- Keep a builder's log with dated entries and photos of your work. The FAA looks at who fabricated and assembled the aircraft when deciding amateur-built eligibility, so a clear record of your own work matters.
- Talk with your local FSDO or a designated airworthiness representative early. Ask what they want to see and when.
- Plan for the repairman certificate if you will be the primary builder. It is applied for at original certification.
- Start a folder for every component's paperwork: manuals, data sheets, receipts, and serial numbers. You will need them for the weight-and-balance, equipment list, and logbooks later.
Common gotchas
- Underestimating the time. A Cub is a long project with hundreds of hours of work. Plan for steady progress instead of big pushes.
- Starting work before you have read the drawings and instructions for that area all the way through.
🎥 Rob's Cubs videos for this phase

2. Fuselage and Stringers
Order of work
- Before you move the fuselage, tie the front and rear stands together so the frame can't twist or drop off a stand.
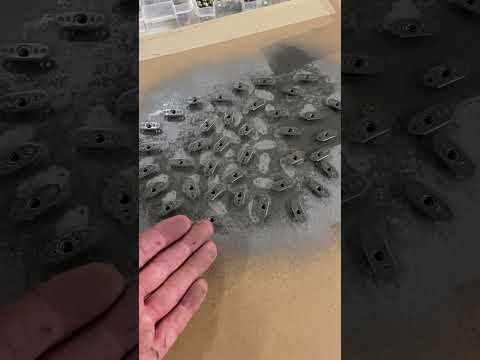
- Inspect the frame carefully when it arrives. Look over the finish, the tabs and fittings, and the overall alignment. Raise questions with the kit supplier before you build on top of anything.
- Fit the stringers, fairing formers, and fabric attach strips after you have confirmed where systems will run. Cables, wiring, and fuel lines are easier to route before the stringers are in the way.
Practical tips
- Dry-fit everything. Clamp or temporarily fasten parts in place, look at them from every side, and only then commit.
- Protect the frame finish. Use padded clamps and cover tubes where you are drilling or grinding nearby.
- Corrosion-proof anything you add to the frame, and treat the inside of anything you open up.
- Think about access. Plan inspection openings so you can reach pulleys, fittings, and attach points after the airplane is covered.
Common gotchas
- Drilling into a frame tube that should not be drilled. Always confirm attachment methods with the drawings and the kit supplier first.
- Forgetting a bracket or tab you will need later. Walk the frame against your systems plan before covering is anywhere in sight.
- Not checking the applicable Airworthiness Directives for the PA-18 design. Even on an experimental, they point to areas worth inspecting closely.
🎥 Rob's Cubs videos for this phase




3. Floorboards and Interior Structure
Order of work
- Fit floorboards after the controls, cables, and any belly wiring are routed, but before seats and interior panels.
- Fit the seats, seat belts, and harness attach points early enough that you can check clearances against the control stick and rudder pedals.
Practical tips
- Make cardboard or thin plywood patterns first. Transfer to the final material only after the pattern fits well.
- Use removable fasteners where you will want access later, such as over pulleys, cable runs, and fuel or brake lines.
- Seal and finish wood parts against moisture before final install.
- Plan the baggage area structure, door and window framing, and any interior panels together. Weight adds up quickly in a Cub interior.
Common gotchas
- Floorboards that rub cables or bind the control stick through its full travel. Check full control movement with everything installed.
- Interior panels that block inspection of fittings that need regular attention.
🎥 Rob's Cubs videos for this phase



4. Tail
Order of work
- Build and fit the stabilizer, elevator, fin, and rudder before covering, and check the hinge and trim mechanisms move freely through their full range.
- Install and adjust the tail brace wires per the drawings. Do the final adjustment after the tail surfaces are covered and mounted.
Practical tips
- Check every hinge for free movement with no binding and no excess play.
- Use the correct bushings and keep them clean and lubricated as the drawings and component instructions specify.
- Pay attention to the rudder post. There is an FAA Airworthiness Directive on PA-18 rudder posts, so confirm the material and design of the part you have with the kit supplier.
- Make sure the trim system runs smoothly end to end before covering hides it.
Common gotchas
- Safetying hardware that later has to come apart for covering. Fit it, then remove it, cover, and reinstall with new safety hardware.
- Tail brace wires adjusted unevenly. Follow the drawings and have your inspector look at them.
🎥 Rob's Cubs videos for this phase



5. Wings
Order of work
- Square and level the wing on solid stands before you fasten anything permanent. Wing roots may sit at different heights, so build the stands to suit.
- Install ribs, compression struts, drag/anti-drag wires, and fittings per the drawings, then check the wing for square before going further.
- Fit fuel tanks, flap and aileron hardware, pitot and wiring, lights, and inspection rings before covering.
- If you are installing aftermarket flaps or other wing modifications, follow that maker's installation instructions step by step and keep them with your build records.
Practical tips
- Check squareness more than once. Measure, adjust, and measure again before final tightening.
- Run any wingtip light wiring and pitot lines early, with grommets or chafe protection wherever they pass through ribs.
- Mark where cables, inspection rings, and drain grommets will go before you cover. A simple drawing of where everything sits inside the wing is a big help later.
- Inspect the lift struts and forks. There is an FAA Airworthiness Directive about corrosion and inspection of PA-18 lift struts and forks.
Common gotchas
- Forgetting to install something inside the wing before covering. Make a pre-cover checklist and walk it with a second set of eyes.
- Rivets or fasteners that interfere with ribs or the covering. Check edge distance and fit against the drawings and AC 43.13-1B.
- Assuming one aftermarket part fits with no changes. Read the installation instructions fully before you start drilling.
🎥 Rob's Cubs videos for this phase
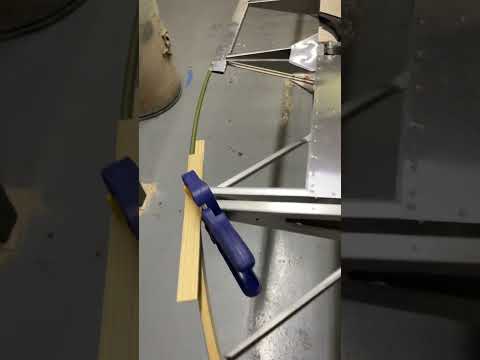
 8 wing prep wire for cover
 13 overhead flap handle
 21 unloading and starting the wing part 1
 22 getting wing ready to cover part 2
 30 lift strut
 35 vgs
 41 priming lift struts
 42 lift strut tip
 58 wing cuff covering tip
 77 leading edge weights
 78 wing build part 1
 79 wing build part 2
 80 wing build part 3
 81 wing build part 4. Flap bracing
 82. Wing build part 5 Leading edge
 96 wiring a wing
 Wing prep for cover part 3
6. Controls and Cables
Order of work
- Route cables through the fuselage before the stringers, floorboards, and interior are in place.
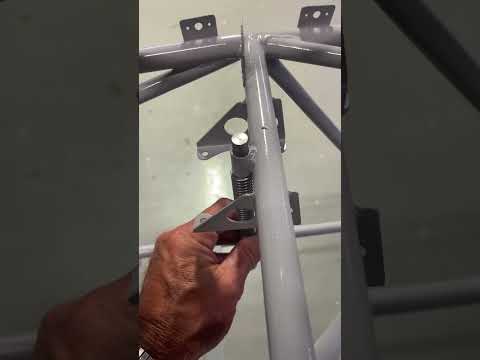
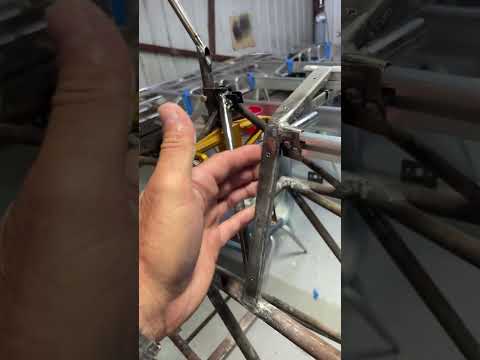
- Install pulleys, fairleads, and guards, then run cables and check for smooth movement and correct direction.
- Do final rigging after the wings and tail are covered and mounted.
Practical tips
- Check every control for the correct direction. It sounds obvious, and it is one of the most important checks on the airplane.
- Make sure cables sit in their pulleys and can't jump out. Use guards and keep tension as specified.
- Use the cable sizes, turnbuckles, and terminals the drawings call for, and safety every turnbuckle and clevis pin correctly.
- Set control stops and travel per the drawings and instructions for any modified surfaces, and record your results.
Common gotchas
- Cables rubbing on structure, wiring, or fabric. Look along the whole run with a light while someone moves the controls.
- Missing cotter pins or safety wire. Do a dedicated safety check pass, separate from installation.
- Flap and aileron interaction on modified wings. Check clearances through full travel of both.
🎥 Rob's Cubs videos for this phase


7. Landing Gear and Brakes
Order of work
- Fit the gear legs, shocks, axles, wheels, and brakes once the fuselage is on its stands and can be safely raised and lowered.
- Install brake lines and the master cylinders before the floorboards close up access.
Practical tips
- Follow the gear and shock maker's installation instructions exactly, including thread engagement and hardware. If two versions of the instructions disagree, use the one that shipped with your parts and ask the maker.
- Don't modify shock or gear parts (grinding, drilling, shortening) without talking to the maker first.
- Bleed the brakes carefully and check for leaks under pressure.
- Check tailwheel steering springs and chains for correct fit and free movement.
Common gotchas
- Brake lines routed where they can chafe or get pinched when the gear moves. Cycle the gear through its travel and look.
- Not checking cam bolts, bushings, or adjusters again after the first taxi tests.
🎥 Rob's Cubs videos for this phase


8. Fuel System
Order of work
- Pressure-test tanks before they go into the wing.
- Install the tanks, lines, vents, selector valve, and gascolator before covering and before the interior closes off access.
Practical tips
- Support fuel lines along their full length and protect them from chafe. Keep them well clear of exhaust and heat.
- Make sure vents are correctly placed, unobstructed, and can't be blocked by ice or bugs.
- Label the fuel selector clearly and verify each position delivers fuel from the correct tank.
- Do a fuel flow test once the system is complete, using the method your inspector or A&P/IA recommends.
Common gotchas
- Leaks at fittings that only show up after the system has sat full for a while. Check again after a day or two.
- Debris in tanks or lines. Clean everything before final assembly and check the gascolator after the first runs.
🎥 Rob's Cubs videos for this phase


9. Firewall Forward
Order of work
- Fit the engine mount, then the engine, then the baffles, exhaust, intake, and cowling.
- Route oil, fuel, and control lines and the wiring before the cowling fitting is final.
Practical tips
- Use the engine maker's installation manual as the main reference, along with the prop maker's instructions.
- Leave room for the spinner backing plate and for clearance to the nose bowl. Check prop-to-cowl clearance early.
- Use fire-resistant lines and fire sleeve where needed, and seal every firewall penetration.
- Inspect the exhaust and muffler closely. AC 43.13-1B covers exhaust inspection, and cracked mufflers are a known carbon monoxide risk.
- Plan the baffling carefully so cooling air goes where it should. Seal gaps.
Common gotchas
- Lines and wires too close to the exhaust. Check after every change in this area.
- Cowling fit problems found late. Fit the cowl as soon as the engine and mount are in, and check again after the baffles and exhaust are final.
- Engine-specific Airworthiness Directives. Check what applies to your engine, cylinders, magnetos, and carburetor or fuel injection.
🎥 Rob's Cubs videos for this phase
 2 side panels behind boot cowl
 19 baffle
 20 mag position to engine mount
 36 baffle cooling
 37 cowling door fit
 38 lower cowl
 39 boot cowl install tip
 45 j3 new boot cowl fit
 46 cleaning oil on j3 trick
 51 cowling tip part 1
 52 cowling tip
 53 cowling tip part 3
 54 cowling tip part 4
 55 cowling tip part 5
 63 boot cowl
 92 Javron style boot cowl
10. Electrical and Instruments
Order of work
- Plan the whole electrical system on paper first: power, ground, circuit protection, switches, and every load.
- Run wiring through the fuselage and wings before covering and interior work.
- Build and test the panel on the bench before it goes in.
Practical tips
- Use aircraft-grade wire and the correct terminals and crimp tools. AC 43.13-1B has a full chapter on aircraft wiring.
- Label every wire at both ends and keep an up-to-date wiring diagram in your records.
- Plan grounds carefully, with a solid main ground path.
- Leave service loops so the panel can be pulled forward for work.
- Keep wiring away from fuel lines, controls, and heat.
Common gotchas
- Wires chafing at structure or grommets. Protect every pass-through.
- Instruments or radios that need specific installation or testing. Follow each maker's instructions and keep the paperwork.
🎥 Rob's Cubs videos for this phase
 5. Skylight
 6 L4skylight8 wing prep wire for cover
 47 aircraft automation auto pilot part 1
 48 aircraft automation auto pilot part 2
 49 aircraft automation auto pilot part 3
 50 aircraft automation auto pilot part 4
 56 instruments panel tip
 62 wire marking
 66 running a wire
 89 electric trim and vertical fin fairing .
 95 Javron skylight95 Javron skylight96 wiring a wing
11. Covering and Paint
Order of work
- Finish every inspection before covering. A pre-cover inspection by your inspector or A&P/IA is a smart step.
- Pick one covering system and follow its manual exactly. Don't mix products from different systems.
- Cover, tape, and finish the surfaces, then paint as the covering system specifies.
Practical tips
- Read the whole covering manual before you start. Practice on a test panel first.
- Rib attachment, stitch spacing, and tape layouts come from the covering system manual, the drawings, and AC 43.13-1B. Don't guess.
- Mark inspection openings, drain grommets, and cable holes before you start. Install reinforcements as the drawings and covering manual direct.
- Control temperature, humidity, and dust in the work area. They have a big effect on the finish.
- Weigh paint and finish. It adds weight quickly.
Common gotchas
- Cutting a fabric opening in the wrong place. Measure from your pre-cover notes and check twice.
- Overheating fabric with the iron. Use the temperatures the covering manual gives and check your iron.
- Forgetting drain grommets on the lowest points.
🎥 Rob's Cubs videos for this phase
12. Final Assembly, Inspection and First-Flight Paperwork
Order of work
- Mount the wings, struts, and tail, and connect controls, fuel, pitot, and wiring.
- Rig the airplane per the drawings and any modification instructions, then have it checked.
- Do the weight and balance, the equipment list, and the logbook entries.
- Get the airworthiness inspection, then flight-test according to your plan.
Practical tips
- Weigh the airplane on calibrated scales and record the datum and leveling method you used. AC 43.13-1B has a chapter on weight and balance.
- Do a thorough condition-style inspection before the airworthiness inspection. Have a second experienced person go over it too.
- Write a flight test plan before the first flight. The FAA's guidance on amateur-built flight testing describes what a good plan covers.
- Do engine runs and taxi tests first. Look for leaks, loose hardware, and temperature problems after each one.
- Keep the records together: builder's log, component paperwork, weight and balance, equipment list, and logbooks.
Common gotchas
- Rushing the end. The last steps are where small oversights show up. Use checklists and take breaks.
- Missing paperwork at the inspection. Ask your inspector for their list ahead of time.
- Skipping a recheck after the first flights. Plan a full look-over after the early test hours.
These notes are general guidance for planning a build. For every specific number or procedure, use the Piper PA-18 drawings, the component maker's instructions, FAA AC 43.13-1B, and your A&P/IA.
🎥 Rob's Cubs videos for this phase
 1 windshield Javron5. Skylight6 L4skylight
 28 door and window seal
 29 door fit
 31 side glass trick
 32 window trick
 33 alternate back glass Javron
 34 plexiglass37 cowling door fit
 44 j3 left side glass removal
 57 baggage door
 61 windshield trick77 leading edge weights
 84 door fit
 93 windshield Javron 95 Javron skylight95 Javron skylight